Ok, finally after promised months ago here my first attempt of writing a knitting pattern in English.
"
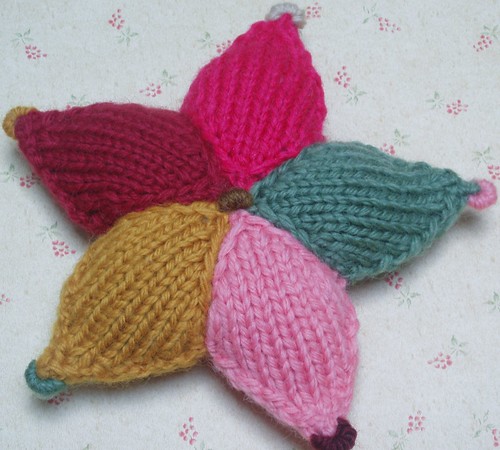
A Knitted star"
 What do you need to make one?
Yarn
What do you need to make one?
Yarn: To make a star with star points in different colours you need 5 colours. You can also choose to make a star in one or in two colours. There are many variations possible. The size of a star depends of the thickness of the yarn and the size of the needles. The thicker the yarn, the larger the star will be. I used soedan wool for this star and needles size 4.5.
Knitting needles: Size depends on the thickness of the yarn.
Needle: To sew the star points together.
Stuffing material: poly-fil or fiberfil or cotton.
Instructions:
1.) Knit 10 star points in five different colours, two of each.
 One star point:
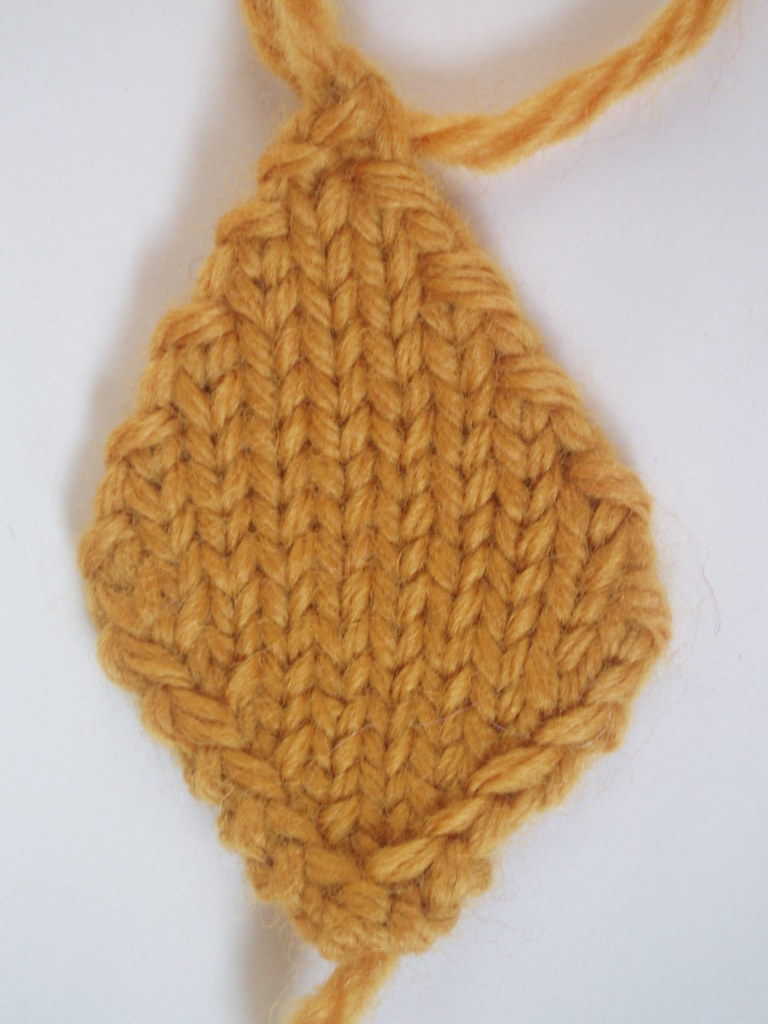
Row 1 : cast on 3 stitches
Row 2 : knit 3
Row 3 : purl 1, inc 1, purl 2
Row 4 : knit 1, inc 1, knit 3
Row 5 : purl 1, inc 1, purl 4
Row 6 : knit 1, inc 1, knit 5
Row 7 : purl 1, inc 1, purl 6
Row 8 : knit 1, inc 1, knit 7
Row 9 : purl 1, inc 1, purl 8
Row 10: knit 1, inc 1, knit 9
Row 11: purl 1, inc 1, purl 10
Row 12: sl 1- knit 1- psso, knit 10
Row 13: sl 1- purl 1- psso, purl 9
Row 14: sl 1- knit 1- psso, knit 8
Row 15: sl 1- purl 1- psso, purl 7
Row 16: sl 1- knit 1- psso, knit 6
Row 17: sl 1- purl 1- psso, purl 5
Row 18: sl 1- knit 1- psso, knit 4
Row 19: sl 1- purl 1- psso, purl 3
Row 20: sl 1- knit 1- psso, knit 2
Row 21: sl 1- purl 1- psso, purl 1,
Cast of by pass stitch over.
- sl = slip stitch from left-hand needle to right-hand one without knitting it.
- psso = pass slipped stitch over.
Slip stitch from left-hand needle to right-hand one without knitting it. Knit the next stitch. Insert tip of left-hand needle into the slipped stitch, pass it over the knitted stitch, and off needle.
2.) Press the ten star points carefully under a damp cloth with an iron.
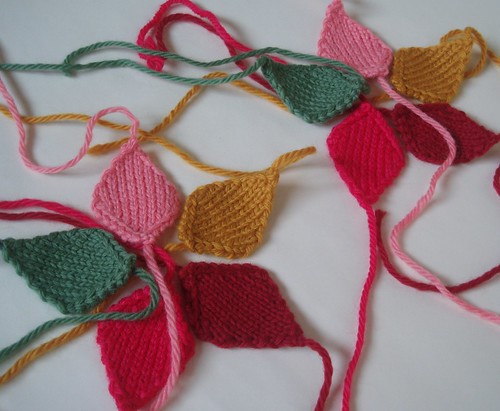
3.) Sew the star points into two stars. Make sure you have a left and a right side, see picture below

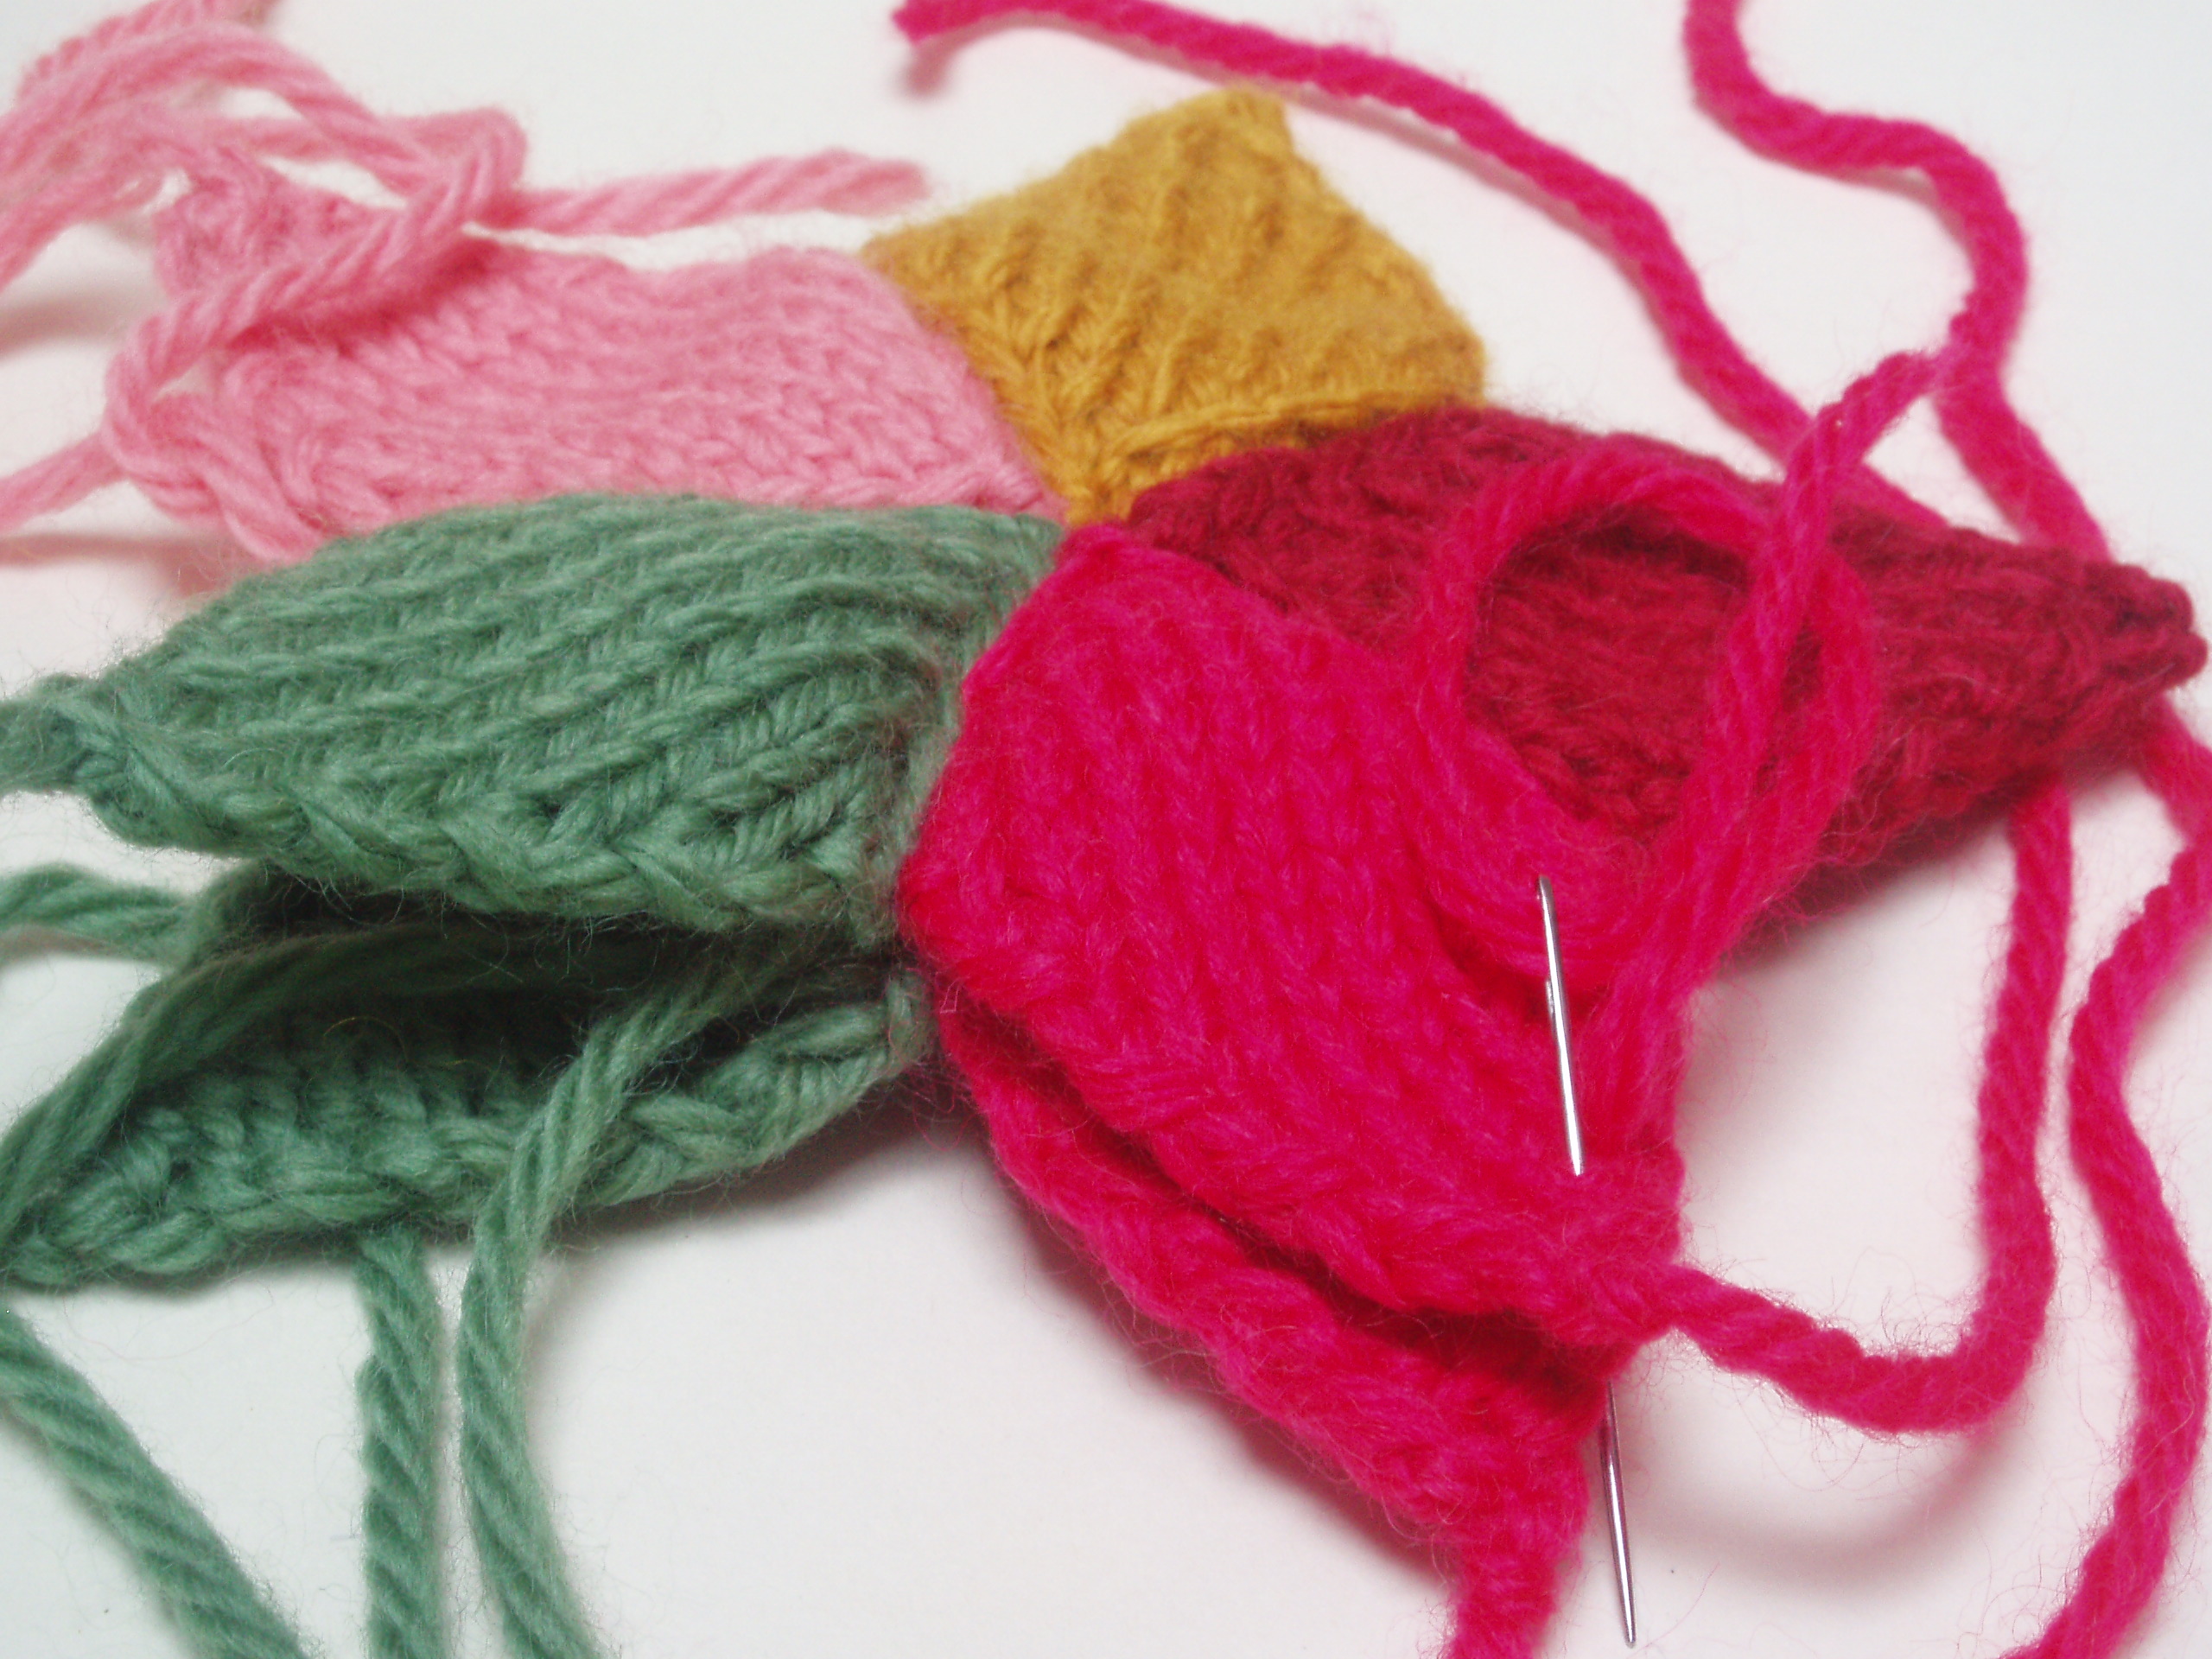
4.) Sew stars together right side out. Leave one star point half open. Fill the star point with cotton or polyfill. Close the half open star point.
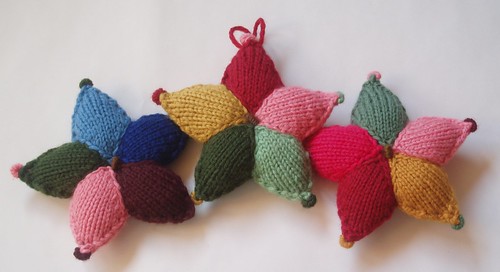
Note: Each star point has a short and a long side. Make sure all the short sides are pointed to the middle of the star.
You can decorate the star if you like. I used the bullion knot stitch. I did one in the middle on each side from the star and on the end of each point.
For those who like tho try this pattern out.....enjoy and good luck!
Thank you Barbara for your german translation.
Gestrickter Stern:
Was braucht man dafür?
Garn: je nach Wunsch bis zu 5 verschiedene Farben, man kann den ganzen Stern auch einfarbig oder zweifarbig … machen. Die Größe des Sterns hängt von der Dicke des verwendeten Garns und der Nadelgröße ab. Ich habe Soedan Wolle verwendet und Nadelstärke 4,5
Stricknadeln: passend zum Garn
Nähnadel um die Sternspitzen zusammen zu nähen
Füllmaterial: Füllwatte o. ä.
Anleitung:
1. Stricke 10 Sternspitzen in fünf verschiedenen Farben, zwei von jeder Farbe.
Reihe 1 : 3 Maschen aufnehmen
Reihe 2 : 3 rechts
Reihe 3 : 1 links, 1 zunehmen, 2 links
Reihe 4 : 1 rechts, 1 zunehmen, 3 rechts
Reihe 5 : 1 links, 1 zunehmen, 4 links
Reihe 6 : 1 rechts, 1 zunehmen, 5 rechts
Reihe 7 : 1 links, 1 zunehmen, 6 links
Reihe 8 : 1 rechts, 1 zunehmen, 7 rechts
Reihe 9 : 1 links, 1 zunehmen, 8 links
Reihe 10: 1 rechts, 1 zunehmen, 9 rechts
Reihe 11: 1 links, 1 zunehmen, 10 links
Reihe 12: 1 abnehmen 10 rechts
Reihe 13: 1 abnehmen 9 links
Reihe 14: 1 abnehmen 8 rechts
Reihe 15: 1 abnehmen 7 links
Reihe 16: 1 abnehmen 6 rechts
Reihe 17: 1 abnehmen 5 links
Reihe 18: 1 abnehmen 4 rechts
Reihe 19: 1 abnehmen 3 links
Reihe 20: 1 abnehmen 2 rechts
Reihe 21: 1 abnehmen 1 links
Abketten
(Abnehmen: Masche von der linken auf die rechte Nadel heben ohne sie zu stricken, nächste Masche stricken, erste abgehobene Masche darüberheben.
2.) Die zehn Sternspitzen vorsichtig unter feuchtem Tuch dämpfen
3.) Die Sternspitzen zu Sternen zusammennähen, dabei sicherstellen, dass man eine rechte und eine linke Seite hat, wie auf dem Bild unten .
4.) Sterne zusammen nähen, mit der rechten Seite nach aussen. Eine Sternspitze etwas offen lassen. Den Stern füllen mit Füllwatte und verschließen
Achtung: Jede Sternspitze hat eine kurze und eine lange Seite. Stelle sicher, dass die kurzen Seiten zur Sternmitte weisen.
Du kannst den Stern dekorieren wenn Du möchtest, ich habe einen Knoten Stich verwendet in der Mitte der Sterne und an jeder Sternspitze.
Für die die es versuchen wollen, viel Spaß und viel Glück.
<<<<<<<<<<<<<<<<<<<


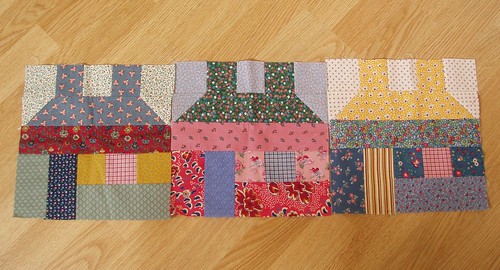
 I found three house blocks made from scraps (they were hiding in the scrap box).